These DIY Wooden Baby Blocks are a fun craft for baby showers and they make a special, personalized gift that both the parents and the baby will love.
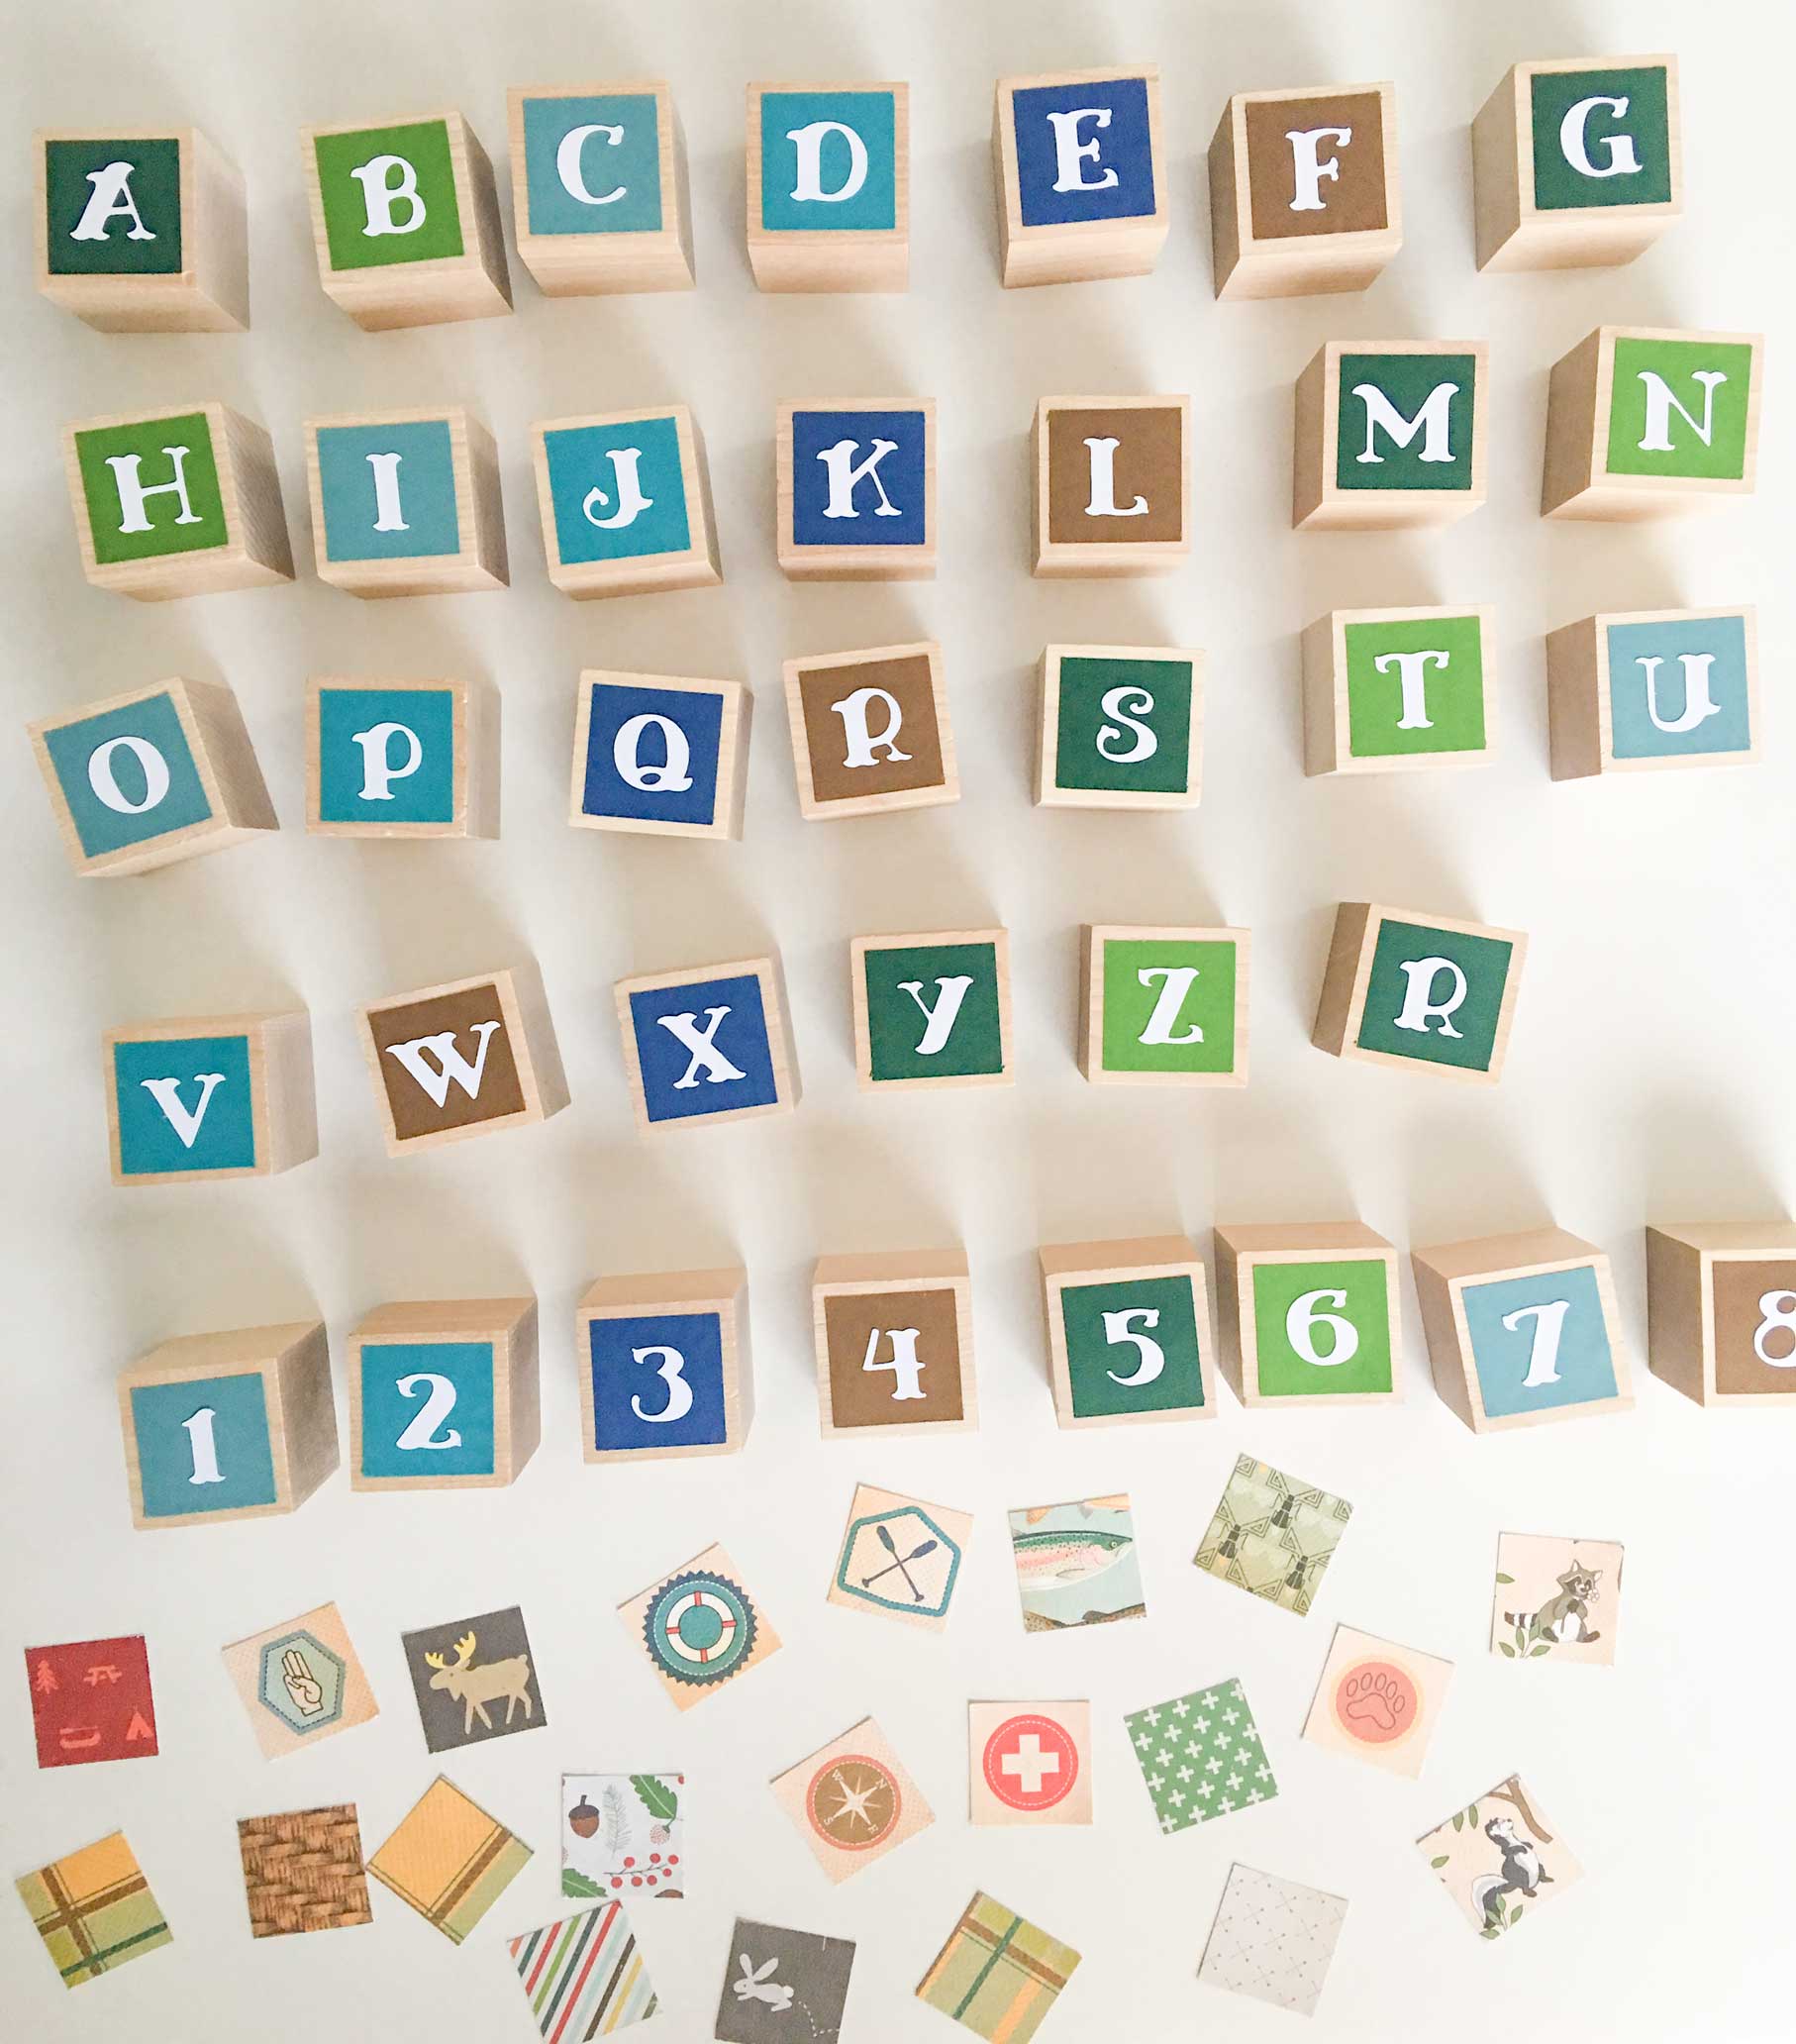
Let me take you back nearly 3 years ago to my sister-in-law’s baby shower. I was put in charge of activities and I wanted to do a fun crafty one. What I came up with was this totally customized Baby Block set that you have the party guests decorate with precut patterned scrapbook paper.

The brilliance of this craft is that it doesn’t request artistic ability to make a nice looking block. Yet, the guests still feel like they are making something personalized and special for the baby, because they get to pick out the patterned squares of paper for their block.
Overall, the craft turned out really well, and honestly, I’d like to do it again, this time with my son when he’s a bit older for a nice, rainy day activity. Sorry I didn’t take more pictures guys, but I did this craft before I started my blog!
WOODEN BABY BLOCK SUPPLIES
WOODEN BABY BLOCKS 1.5” (35 or 50 pack)
PATTERNED SCRAPBOOK PAPER AND THIS ONE
PAPER PLATES
¾” LETTER STICKERS OR LETTERS CUT FROM PAPER WITH A CRICUT
WOODEN BABY BLOCK DIRECTIONS
PRIOR TO PARTY
ORDER SUPPLIES
I ordered my supplies on Amazon using the links provided here. For the Alphabet letters, I used white scrapbook paper and my Cricut machine to cut out letters. If you don’t have a Cricut, look around for nice Alphabet Letter Stickers about ¾” big. You want them to be small enough to fit centered in a square of solid scrapbook paper.
For the blocks, I ordered the 35/36 block pack but one was missing so it wasn’t enough to do the whole alphabet AND numbers 1-9, which is what I wanted. For a few extra bucks you could get the set of 50 to be safe.
PREPARE THE LETTERED SIDE
I prepared the lettered side of the block at home to ensure it was centered well and so the block had a dry side to rest on after the party guests painted theirs with mod podge.
Apply glue with a glue stick to a square of paper, then press, centered, onto one side of a 1.5” wooden block. Allow to dry for a few minutes. Then, coat with a light coat of mod podge using the foam brush. Make sure to not leave any drips of excess mod podge.
CUT OUT PATTERNED PAPER
Prior to the party I also cut out squares of patterned scrapbook paper for the guests to use at the party. Collect them in a zip-lock bag until the party, then put them in a spacious box or tray so guests can easily look for the ones they want.
AT PARTY
SET OUT SUPPLIES & HAND OUT BLOCKS
At the party, set out a paper plate and a block for each guest. Then fill the condiment cups with mod podge. Set out foam brushes and glue sticks. Pass around squares of patterned paper.
GLUE ON PAPER SQUARES
Tell guests to apply glue to the back of the paper squares, then firmly adhere to the center of one side of the block. Do this to all sides of the block, then allow to dry for a few minutes.
COAT WITH MOD PODGE & DRY
Next, paint a thin layer of mod podge onto all sides, EXCEPT THE LETTERED SIDE. Allow to dry, resting the block with the letter side face down and make sure there are NO DRIPS of excess mod podge.
Collect the blocks and let them dry fully on a non-stick surface if possible, like the lid of a sterlite container.
POST PARTY
COAT WITH AN OPTIONAL SECOND LAYER OF MOD PODGE
It’s not necessary, but the more coats of mod podge, the more durable the blocks will be.
Another tip: If you want to make it more personal, you can purchase some sharpie paint pens and let the guests initial or sign one side of the block, maybe using solid paper.

Like this idea for DIY Wooden Baby Blocks? Save it to your favorite Pinterest board to later using the image below!


No Comments